Myrren Modern Textured Glass Globe Pendant Light|Luica Living – Lucia Living

Myrren Modern Textured Glass Globe Pendant Light

10% OFF 13% OFF 15% OFF
10% OFF 1 Item | Lucia10
13% OFF 2 Items | Lucia13
15% OFF 3 Items | Lucia15
$229.00
Size: Small - 10" (25.4cm)
Free Shipping Icon
Free Shipping
14 Days Return Icon
14 Days Return
Discounts Icon
Exclusive Discounts
Customer Service Icon
Customer Service
Myrren Modern Textured Glass Globe Pendant Light
$229.00

Myrren Modern Textured Glass Globe Pendant Light

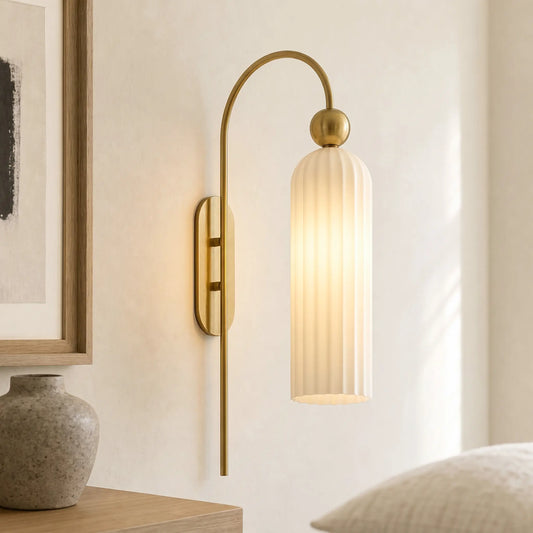
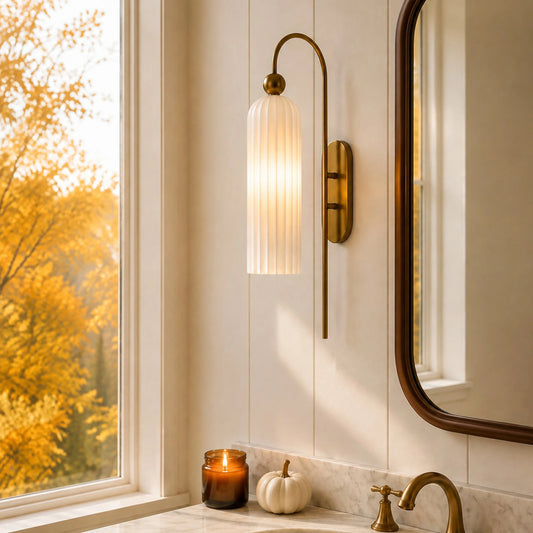
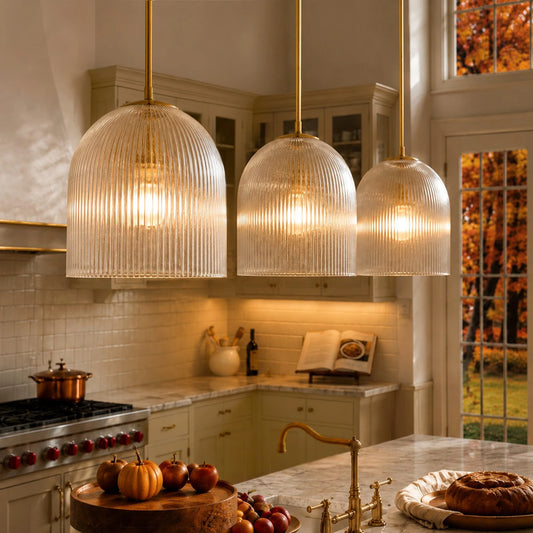
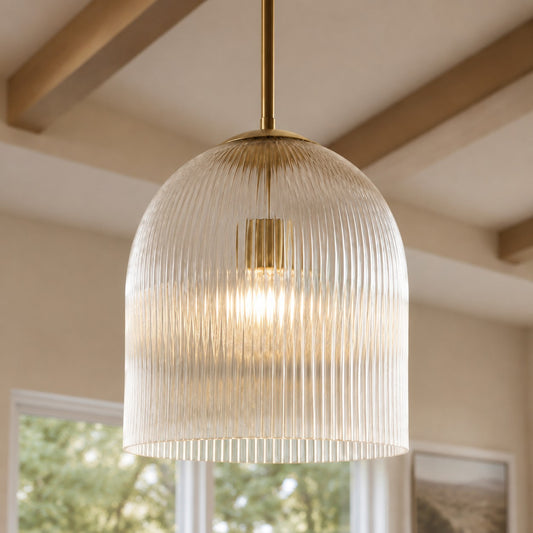
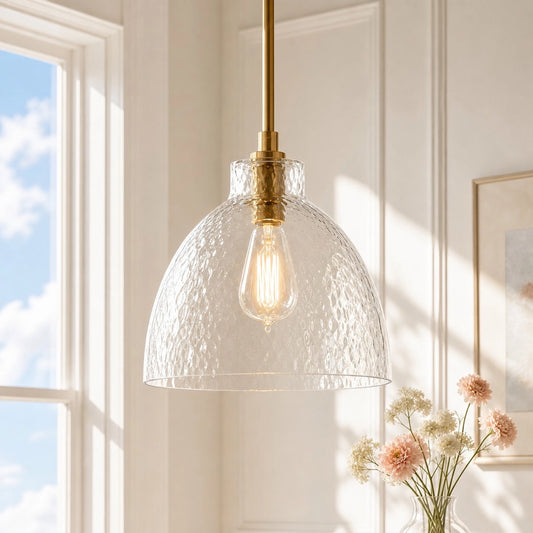
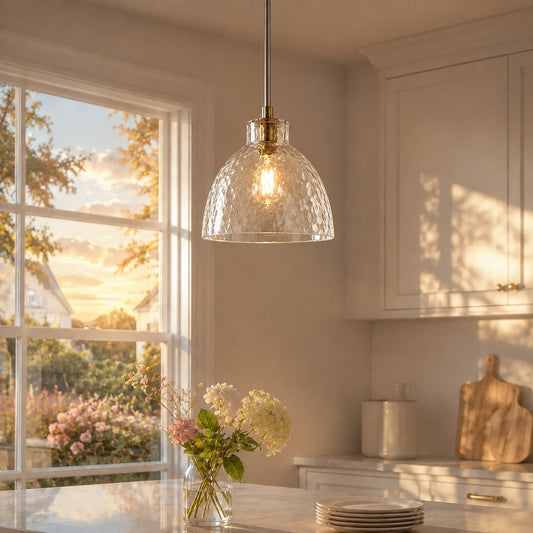
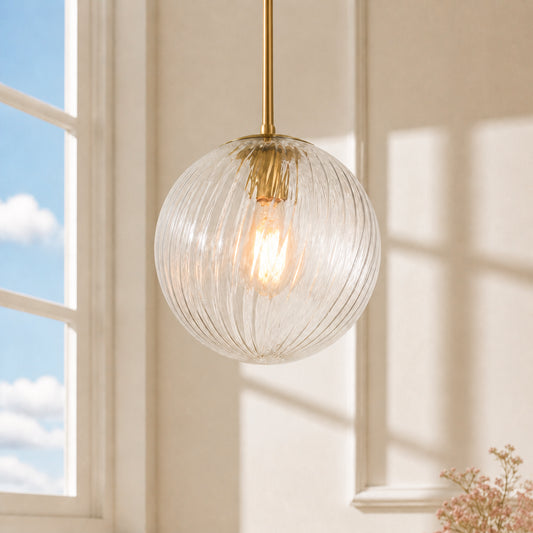
Brighten your home with a graceful single‑bulb fixture, featuring a transparent fluted shade that scatters a soft, welcoming glow. Finished in warm brass, it complements kitchen islands, dining nooks, foyers, breakfast bars and casual living spaces.

小场景图4.webp__PID:5b9332c7-f2fc-4af0-b6de-f86da8f447ad
大场景图2.webp__PID:30eaf5c8-71a4-405b-9332-c7f2fc4af0f6
大场景图.webp__PID:b7dd30ea-f5c8-41a4-905b-9332c7f2fc4a

Reasons to Opt for this Light

Distinctive Light Diffusion
Glass patterns break harsh brightness and cast warm, cozy glow throughout the room.

小场景图2.webp__PID:905b9332-c7f2-4c4a-b0f6-def86da8f447
小场景图1.webp__PID:a4905b93-32c7-42fc-8af0-f6def86da8f4

Refined Outer Silhouette
Vintage‑brass‑coated iron frame matches glass shade for pleasing retro‑modern looks.

Textured Glass Aesthetics
The patterned glass features natural undulations, softening light and adding fine surface detail.

大场景图1.webp__PID:dd30eaf5-c871-4490-9b93-32c7f2fc4af0

Product Specifications

尺寸图大号.webp__PID:8eb7dd30-eaf5-4871-a490-5b9332c7f2fc

Size-2

Attribute Detail
Material iron,Glass
Socket Type E26 (Not Included)
Size Small - 10" (25.4cm)
Large - 14" (35.56cm)
Minimum Hanging Length 28"
Maximum Hanging Length 63.5"
Canopy 5" diam, 1" th
Includes two 12" poles and one 24" pole.
Suggested Bulb one 60W Type A standard Bulb(s)
or LED equivalent

Details

细节图3.webp__PID:71a4905b-9332-47f2-bc4a-f0f6def86da8
细节图2.webp__PID:c871a490-5b93-42c7-b2fc-4af0f6def86d
细节图1.webp__PID:f5c871a4-905b-4332-87f2-fc4af0f6def8

Vielen Dank für Ihre Aufmerksamkeit und Unterstützung für Lucia Living! Hier finden Sie einige häufig gestellte Fragen und Antworten, die Ihnen hoffentlich helfen, unsere Dienstleistungen besser zu verstehen:

Wie hoch sind die Liefergebühren?

Wir bieten kostenlosen Versand für alle Bestellungen auf unserer Website an.

Bieten Sie Rückgabe und Umtausch an?

Wir akzeptieren Rücksendungen innerhalb von 14 Tagen ab Kaufdatum. Um für eine Rückgabe berechtigt zu sein, muss der Artikel unbenutzt, im Originalzustand und in der Originalverpackung sein. Bitte legen Sie der Rücksendung die Original-Bestellbestätigung oder den Lieferschein bei.

Welche Zahlungsmöglichkeiten gibt es?

Akzeptierte Zahlungsmethoden sind PayPal, Visa, Mastercard, Discover, American Express, Diners Club, JCB, Cartes Bancaires, Maestro, UnionPay und Visa Electron. Sie können während des Zahlungsvorgangs die für Sie bequemste Zahlungsmethode auswählen.

Umsatzsteuerrichtlinie

Lucia Living ist von den US-Steuerbehörden verpflichtet, auf Bestellungen, die in bestimmte US-Bundesstaaten versandt werden, Umsatzsteuer zu erheben.

Die Umsatzsteuersätze und -vorschriften variieren je nach Bundesstaat und Ort; ob Steuern erhoben werden, hängt vom Lieferort und den geltenden Landes- und Kommunalgesetzen ab.

Falls erforderlich, wird die Umsatzsteuer automatisch berechnet und beim Bezahlvorgang zum Gesamtbetrag der Bestellung hinzugefügt.

Die gegebenenfalls anfallende geschätzte Umsatzsteuer wird Ihnen vor Abschluss der Zahlung auf der Checkout-Seite deutlich angezeigt.

Lucia Living erhebt die Umsatzsteuer ausschließlich als vorgeschriebener Vermittler im Auftrag der zuständigen US-Steuerbehörden.

Alle eingenommenen Umsatzsteuerbeträge werden direkt an die zuständigen Regierungsbehörden abgeführt und werden von Lucia Living weder einbehalten noch kontrolliert.

Steuerrückerstattungen

Die Umsatzsteuer ist grundsätzlich nicht erstattungsfähig, sobald eine Bestellung versandt oder abgeschlossen ist, da die erhobene Steuer gemäß den geltenden Gesetzen und Vorschriften an die US-Steuerbehörden abgeführt wird.

Wird eine Bestellung vor dem Versand storniert, wird die bereits erhobene Umsatzsteuer zusammen mit dem erstatteten Bestellbetrag zurückerstattet. Bei Teilstornierungen wird auch die auf den stornierten Teil entfallende Umsatzsteuer erstattet. Lucia Living wird in solchen Fällen im Rahmen der geltenden Bestimmungen angemessene Anstrengungen unternehmen, die entsprechende Steueranpassung oder -erstattung bei den zuständigen Finanzbehörden zu melden und geltend zu machen.

Wie kann ich eine Bestellung stornieren oder ändern?

Um eine Bestellung zu stornieren oder zu ändern, kontaktieren Sie bitte umgehend unseren Kundenservice. Solange die Bestellung noch nicht versandt wurde, werden wir alles daransetzen, Ihrem Wunsch nachzukommen. Sollte die Bestellung jedoch bereits versandt worden sein, müssen Sie für eine Rücksendung gegebenenfalls unsere Rückgabebestimmungen beachten.

Wie viele Tage haben Kunden Zeit, ein Produkt zurückzugeben?

Wir bieten ein 14-tägiges Rückgaberecht. Die Kosten für den Rückversand trägt der Kunde. Wir empfehlen Ihnen, einen Versanddienst mit Sendungsverfolgung zu nutzen, um sicherzustellen, dass Ihre Rücksendung bei Ihnen eingeht.

Wie hoch ist die Wiedereinlagerungsgebühr?

Wenn die Rückgabefrist abgelaufen ist oder die Rückgabe aus persönlichen Gründen erfolgt (z. B. Meinungsänderung, Auffinden eines niedrigeren Preises usw.), wird eine Wiedereinlagerungsgebühr in Höhe von 20 % des Produktpreises erhoben.

Wie hoch sind die Rücksendekosten?

Wenn eine Rücksendung aufgrund eines Produktmangels erforderlich ist, bieten wir kostenlosen Rückversand an; bei Rücksendungen aus persönlichen Gründen trägt der Kunde die tatsächlichen Rückversandkosten.

Rückgabemethode?

So senden Sie uns Ihre Rücksendung: Per Post

Sollten Sie Fragen zu den FAQs haben, kontaktieren Sie uns bitte unter support@lucialiving.com .

Danke!

LUCIA installation guide

Plan your lighting.

Room-by-room starting points for fixture size, hanging height, spacing, and clearance.

Room-by-room guide

Choose a space.

Select the setup closest to your room and jump directly to its measurements and placement checks.

01

Dining table

Size and center the fixture from the tabletop, then confirm the view from every seat.

How to measure
Measure the table's length and width. For a round table, use its diameter.
Starting range
A round fixture often feels balanced at about one-half to two-thirds of the table width. A linear fixture can begin at one-half to two-thirds of the table length.
Placement
Center the light over the table, not necessarily the room. Keep the fixture within the table footprint and visually clear of seated sight lines.
Clearance
Start 30-36 inches above the tabletop. With ceilings above 8 feet, raise the fixture only as needed to keep the room open and the light connected to the table.
For a long tableTwo smaller pendants may read more naturally than one oversized fixture.

Lay out the centers evenly along the table and keep the outer fixtures comfortably inside the table ends.

Before drilling

Tape a paper outline to the ceiling or suspend a lightweight template at the planned height. Check it from the doorway and from a seated position.

Dining table pendant placement A pendant centered over a dining table with a vertical clearance measurement. SIDE ELEVATION Ceiling Lowest point Tabletop 30-36 in Centered on the table
Measure
Tabletop to lowest point
Start
30-36 in
Align
Center on the table
Use the table, rather than the room, as the alignment reference.

02

Kitchen island

Coordinate fixture width, quantity, and center spacing across the usable island surface.

How to measure
Measure the usable island length and width, excluding overhangs that do not need task light. Note where people stand and where stools are placed.
Starting range
For a single linear fixture, begin at one-half to two-thirds of the island length. For multiple pendants, choose a modest diameter before deciding how many fit.
Placement
Keep pendant centers evenly spaced on the island centerline. Map equal centers across the usable run, then confirm that adjacent shades retain comfortable breathing room.
Clearance
Start 30-36 inches above the counter. Preserve an open view across the island and keep the outer pendants in from the island ends.
Quantity checkChoose the count only after the fixture width is known.

More fixtures require smaller shades and closer coordination. Fewer fixtures can be larger, but should not crowd the ends of the island.

Lucia note

Mock up the full row, not just one pendant. Three paper circles taped above the island reveal spacing problems much faster than a single sample.

Kitchen island pendant spacing Three pendants spaced evenly above a kitchen island. SIDE ELEVATION Ceiling Equal center spacing Usable island run 30-36 in Match both end insets
Measure
Countertop to lowest point
Start
30-36 in
Align
Equal centers and end insets
Coordinate shade width, fixture count, and center spacing as one layout.

03

Room center

Estimate fixture width from the room dimensions, then check visual weight and walking clearance.

How to measure
Measure room length and width in feet, plus finished ceiling height. Note doors, tall furniture, and the main walking path.
Starting range
Add room length and width in feet. The same number in inches is a common starting diameter - for example, 12 + 10 suggests about 22 inches.
Placement
Use the architectural center only when it also makes sense from the doorway and furniture plan. A seating arrangement may call for a visual center instead.
Clearance
Maintain at least 7 feet of clear height below the lowest point in an open walking area. Low ceilings usually favor flush or compact semi-flush forms.
Visual-weight checkOpen forms can feel lighter; dark or dense shades can feel larger.

Compare one size smaller and one size larger in the room before treating the formula as final.

Before drilling

Confirm that the junction box is rated to support the fixture's weight. Heavy fixtures may require additional bracing.

Room center fixture proportion A plan view showing a round light centered within a rectangular room. ROOM · PLAN VIEW Light fixture Recommended width Room length (ft) Room width (ft)
Formula
Length + width (ft)
Start
Same total (in)
Clear path
7 ft minimum
The room formula sets a starting diameter; ceiling height and visual weight finish the decision.

04

Hallway and entry

Set fixture count from spacing, then keep equal end offsets and a clear walking path.

How to measure
Measure the clear corridor length and width. Mark door swings, openings, stairs, and any point where the ceiling changes.
Starting range
In a narrow passage, begin by testing compact fixtures about 6-8 feet on center, then adjust for ceiling height, beam spread, and light output. Wider entries can support one larger fixture or a more closely spaced rhythm.
Placement
Align fixtures on the path centerline. Start the first and last fixture at roughly half the center-to-center spacing from the corridor ends.
Clearance
Keep at least 7 feet below the lowest point and make sure open doors, tall cabinets, and stair sight lines remain clear.
For unusually long hallsDecide the fixture count from spacing - not from a single oversized diameter.

Once a count is chosen, divide the usable run into equal bays and check the end offsets before wiring.

Lucia note

A dimmer can make repeated fixtures more adaptable across daytime, evening, and overnight use.

Hallway fixture spacing Four ceiling fixtures equally spaced along a corridor. Each end offset is half the center-to-center spacing. PLAN VIEW 6-8 ft on center 1/2 spacing 1/2 spacing Match the first and last offsets
Start
6-8 ft on center
End offset
About 1/2 spacing
Clear path
7 ft minimum
Keep equal center spacing, with about half that distance at each end.

05

Bathroom vanity

Place light for even facial illumination while keeping mirrors, cabinets, and wet locations clear.

How to measure
Measure mirror width, mirror height, vanity width, and the available wall area on both sides. Note the sink centerline.
Starting range
For paired sconces, aim for the visible center of each sconce at about 65-70 inches above the finished floor (AFF), then adjust for fixture shape, mirror height, and the primary user's eye level. For an over-mirror bar, begin around three-quarters of the mirror width.
Placement
Place paired sconces symmetrically on both sides of the mirror. Keep the nearest edge of each fixture about 3-6 inches from the mirror edge where the product shape allows, while keeping the light source near face level.
Clearance
Confirm mirror edges, medicine-cabinet swing, faucets, and adjacent doors. Use fixtures with the appropriate damp or wet-location rating for the exact location.
Most even resultSide lighting usually softens facial shadows better than a single light overhead.

If side wall space is limited, choose a wide over-mirror fixture with a diffused shade.

Before drilling

Hold the sconce at the proposed height while someone checks the reflection. Shift it before wiring if the bulb or bright edge is directly visible in the mirror.

Bathroom vanity sconce placement Two sconces placed symmetrically at the sides of a mirror, centered about 65 to 70 inches above the finished floor and set about 3 to 6 inches from the mirror edges. FRONT ELEVATION Mirror Face level 3-6 in Vanity 65-70 in AFF
Sconce center
65-70 in AFF
Mirror gap
About 3-6 in
Align
Paired at face level
Center side sconces about 65-70 inches AFF, leave about 3-6 inches from the mirror edge, then check the actual reflection before installation.

06

Bedroom and bedside

Set the light from the seated position and keep the switch, shade, and brightest source easy to use.

How to measure
Record mattress-top height, nightstand height and width, headboard height, and the seated shoulder or eye level of the main user.
Starting range
For a table lamp, aim to bring the bottom of the shade close to seated shoulder level. Keep the shade comfortably within the nightstand width.
Placement
Place a wall sconce or pendant where its light falls across the book or bedside surface without shining directly into the user's eyes.
Clearance
Keep swing arms, shades, and cords clear of pillows and head movement. Confirm the switch can be reached from bed without stretching.
Pairing checkMatch the light source height before matching the fixture shape.

Two different nightstand heights may require adjustable lamps or independently set wall lights.

Lucia note

Test the light while seated in bed. A placement that looks balanced from the doorway can still create glare at pillow height.

Bedside lamp height A table lamp beside a bed with the shade bottom aligned near seated shoulder level. SIDE ELEVATION Shade bottom near seated shoulder Set from seated posture Switch within reach
Set height
Seated shoulder level
Keep clear
Pillows and head
Control
Switch within reach
Use the seated position, not the standing view, to set the shade and light-source height.

07

Reading and living

Position the lamp beside or behind the reader so the page is lit without direct glare.

How to measure
Measure seat height, arm height, and the distance from the chair or sofa to the proposed lamp position. Sit in the actual reading posture.
Starting range
For a floor lamp, begin with the bottom of the shade near seated eye level. For a table lamp, use a table height that places the light above the shoulder and beside the page.
Placement
Place the lamp slightly behind or beside the reader's shoulder so the light reaches the page without casting a strong hand shadow.
Clearance
Keep the base out of the walking path and cords away from chair movement. Confirm that adjustable arms do not swing into nearby furniture.
Comfort checkThe bulb and brightest part of the shade should not be visible at seated eye level.

If glare remains, lower the lamp, choose a deeper shade, or use a more diffused light source.

Lucia note

Test the reading light with the room's other lights on and off. A dimmable source makes it easier to balance task light with evening ambience.

Reading floor lamp placement A floor lamp positioned beside and slightly behind a reading chair with the shade near seated eye level. SEATED READING POSITION Shade bottom near seated eye level Light reaches the page Beside or slightly behind the shoulder
Shade bottom
Near seated eye level
Position
Beside or behind shoulder
Keep clear
Walking path
Place the light beside or just behind the reader, with the brightest source out of direct view.

Before installation

Final installation checklist.

Use the recommendation as a starting point, then confirm the final layout on site.

01Fit

Check the fixture from the main viewpoints and keep doors, cabinets, furniture, and walking paths clear.

02Support

Confirm fixture weight, mounting hardware, and junction-box support with a qualified installer.

03Code

Verify product instructions, local electrical requirements, and damp or wet ratings where needed.

Still unsure? Send your room dimensions and a clear photo to support@lucialiving.com.

Return to the size calculator
LUCIA lighting size calculator

Find the right light size.

Choose a room, add a few measurements, and get a practical size and layout recommendation in about two minutes.

Approximate measurements are fine.

Start hereChoose your room below

Step one

Choose a room.

Select the closest match.

Step two

Choose the position.

Step three

Choose a fixture type.

Step four

Add the key measurements.

An estimate is fine if the room is not finished yet.

Refine with ceiling height Add ceiling heightHide details
Your result

Your recommendation.

Recommended size
-
Room checks and practical notes Show room checksHide room checks
Designer note

Before you drill

How this estimate works Read the methodHide the method

Still unsure? Send your room dimensions to support@lucialiving.com and we can help narrow it down.This is a proportional starting point. Confirm fixture weight, junction box support, clearances, and local electrical requirements with a qualified installer.

Das könnte Ihnen auch gefallen

Zuletzt angesehen

Danke fürs Abonnieren!
Diese E-Mail-Adresse wurde registriert!
Tut mir leid! Produkte allein reichen nicht aus.
Das Empfänger-E-Mail-Feld darf nicht leer sein.
Die Rücksendung muss innerhalb von 90 Tagen ab jetzt erfolgen.
Vielen Dank für Ihre Registrierung! Wir benachrichtigen Sie per E-Mail, sobald der Artikel wieder verfügbar ist.